Cardboard Rug Weaving Activity
🧶 Rug Weaving Activity with Cardboard for Ages 6–12: Patience and Imagination Hidden Between the Threads
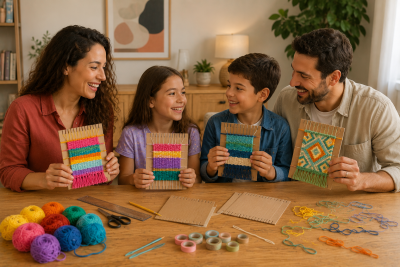
The rug weaving activity done by stretching yarn over cardboard is a very special work that develops both the attention and hand skills of children. It transforms into a calming, productive, and educational experience, especially for children aged 6–12.
A thread passing under another, colors coming together, and a pattern slowly emerging... It is not just an activity for the child, but a journey of watching their own labor.
And the best part is:
The child begins to feel the value of things that emerge with patience.
🧰 Required Materials
- Thick cardboard
- Colored wool yarns
- Scissors
- Ruler
- Pencil
- Tape
- Large plastic needle (optional)
🌿 Before Starting the Activity…
Choose yarn colors together with your child.
“Which colors do you think look nice next to each other?”
“What would you like this rug to tell?”
These little questions not only allow the child to create but also to think and dream.
Because sometimes children speak with colors.
🎨 Recommended Step-by-Step Rug Weaving Activity
1. Preparing the Cardboard
First, make small cuts at the top and bottom of the cardboard. These sections will be the area where the yarns will be stretched.
Then, tie the long yarns from top to bottom.
This stage teaches the child to establish order.
2. Choosing Colors
Now it's time for colors…
Let them mix the yarns and try them side by side. They might use their favorite colors or make completely different choices.
There is no right or wrong here.
👉 “You can imagine it however you like.”
3. Starting to Weave
Start weaving by passing the colored yarns under and over each other.
At first, they may struggle. They might become impatient. But as they progress a bit, they will find their own rhythm.
And at that moment, the child realizes:
👉 “Things that progress slowly can also be beautiful.”
4. Creating Together
Be there with them. Maybe weave a few rows yourself, then let them take over.
Because sometimes the most beautiful thing for a child is to quietly create something together.
Just being at the same table creates a bond.
5. Completing the Weaving
When the rug reaches the desired length, carefully tie the ends of the yarns and remove it from the cardboard.
Secure the yarns at the top and bottom by knotting them. If you wish, you can add small tassels to the edges.
Examine the rug that has emerged together.
It may not be perfect…
But it completely belongs to them.
And at that moment, the child feels:
👉 “I made this.”
🌸 Enhance with Small Touches
- You can add tassels to the edges of the rug
- You can attach small beads to the center
- You can give a name to the rug they made
Like “Colorful Path,” “Dream Rug,” “Sky Pattern”...
Giving a name helps them connect with what they have created.
🌈 Ideas to Enrich the Activity
- You can hang the rug on the wall
- You can make a small rug for their doll
- You can try new patterns with different colors
- Everyone in the family can design their own small rug
💛 Small But Important Notes
- Don’t expect it to look perfect
- Don’t correct mistakes immediately
- Accompany instead of intervening in the process
- Don’t pressure them to be patient
- Appreciate what has emerged together
🌿 Final Words
Teaching a child the value of creating sometimes just passes through a thread.
The colors that pass under and over a thread actually turn into a small reflection of the child's inner world.
Maybe that little rug will stay in a drawer years later…
But that calm moment spent together will always be remembered.
Because some memories touch silently…
And stay within a person for a long time.
🧶 Continue to rebuild with love.