Celebration Cards Designed with Imagination
🎂 Birthday Card Activity for Ages 6–12: Big Emotions from Small Hands
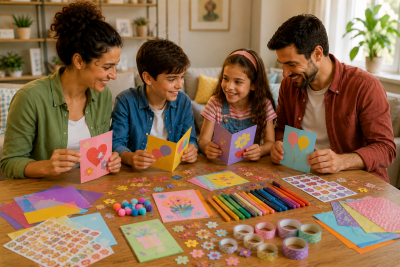
Preparing a birthday card is a very special activity that not only develops children's fine motor skills but also nurtures their feelings of love, thoughtfulness, and self-expression. It can turn into both a fun and emotional experience, especially for children aged 6–12.
Because a child learns the following with a small card they made themselves:
“I can put in effort to make someone happy.”
🧰 Required Materials
- Colored cardstocks
- Construction paper or thick paper
- Markers
- Pastel or crayon
- Glue
- Scissors
- Stickers, glitter, or colored tapes
- Small decorative papers
- Optional ribbons, buttons, or stickers
🌿 Before Starting the Activity…
Discuss who the card is being prepared for.
“How do you think they will feel when they see this card?”
“What colors might make them happy?”
These small questions help the child not only to create but also to think. Because sometimes a card is a visible form of a small love.
🎨 Suggested Step-by-Step Birthday Card Activity
1. Choosing Colors and Shapes
First, choose the cardstocks and decorations together. Give the child the opportunity to make their own decisions. Hearts, stars, flowers, or shapes entirely from their imagination...
What matters here is not how perfect it looks, but that it belongs to them.
2. Designing the Card
Let them think about what they want to do on the card's cover. They can draw a picture, write a name, or freely decorate with colors.
Lines may be crooked, letters may be bent... that's okay.
👉 “What matters is not how it looks, but that it is made with love.”
3. Writing a Small Message Inside
Whether they write a single word or a small sentence...
“Happy Birthday”
“I love you”
“Be happy”
Sometimes the shortest sentences written by children carry the truest emotions.
4. Decorating Together
Stick on stickers, cut out small shapes, add glitter...
Be there with them, but be a companion, not a director.
Because the most valuable thing for the child is that calm time spent together.
5. Completing the Card
When the card is finished, review it together.
Maybe there’s a heart cut out crooked...
Maybe the colors have spilled...
But that’s exactly why it is special.
And in that moment, the child feels:
👉 “I made this card.”
🌸 Leave a Small Mark on the Back of the Card
You can write the date.
You can leave a small handprint.
Or you can write a tiny note together.
Years later, when looking back, that card will not just be a piece of paper... it will turn into a memory.
🌈 Ideas to Enrich the Activity
- You can put the card in a small envelope
- You can add a tiny drawing inside
- You can sing a song together while giving the card
- You can allow the child to give the card with their own hands
These small details strengthen the child's ability to build emotions.
💛 Small But Important Notes
- Don’t expect it to look perfect
- Don’t correct the writings
- Don’t interfere with the process, just accompany
- Don’t worry about the mess
- Enjoy the moment
🌿 Final Words
One of the most beautiful ways to teach a child to show love is to give them the opportunity to make someone happy with their own effort.
Perhaps that card will age over time and stay in a drawer...
But the emotion they put into it will never be forgotten.
Because some gifts do not come from the store... they come from the heart.
🌱 Continue to rebuild with love.